

Vegan gluten free lady fingers recipe can only mean one thing, there’s a tiramisu recipe also on its way. A lemon tiramisu to be precise. But the fingers are obviously a vital part, and not gluten free and vegan ones aren’t the easiest to find, so I needed to find a way to create the perfect texture myself.
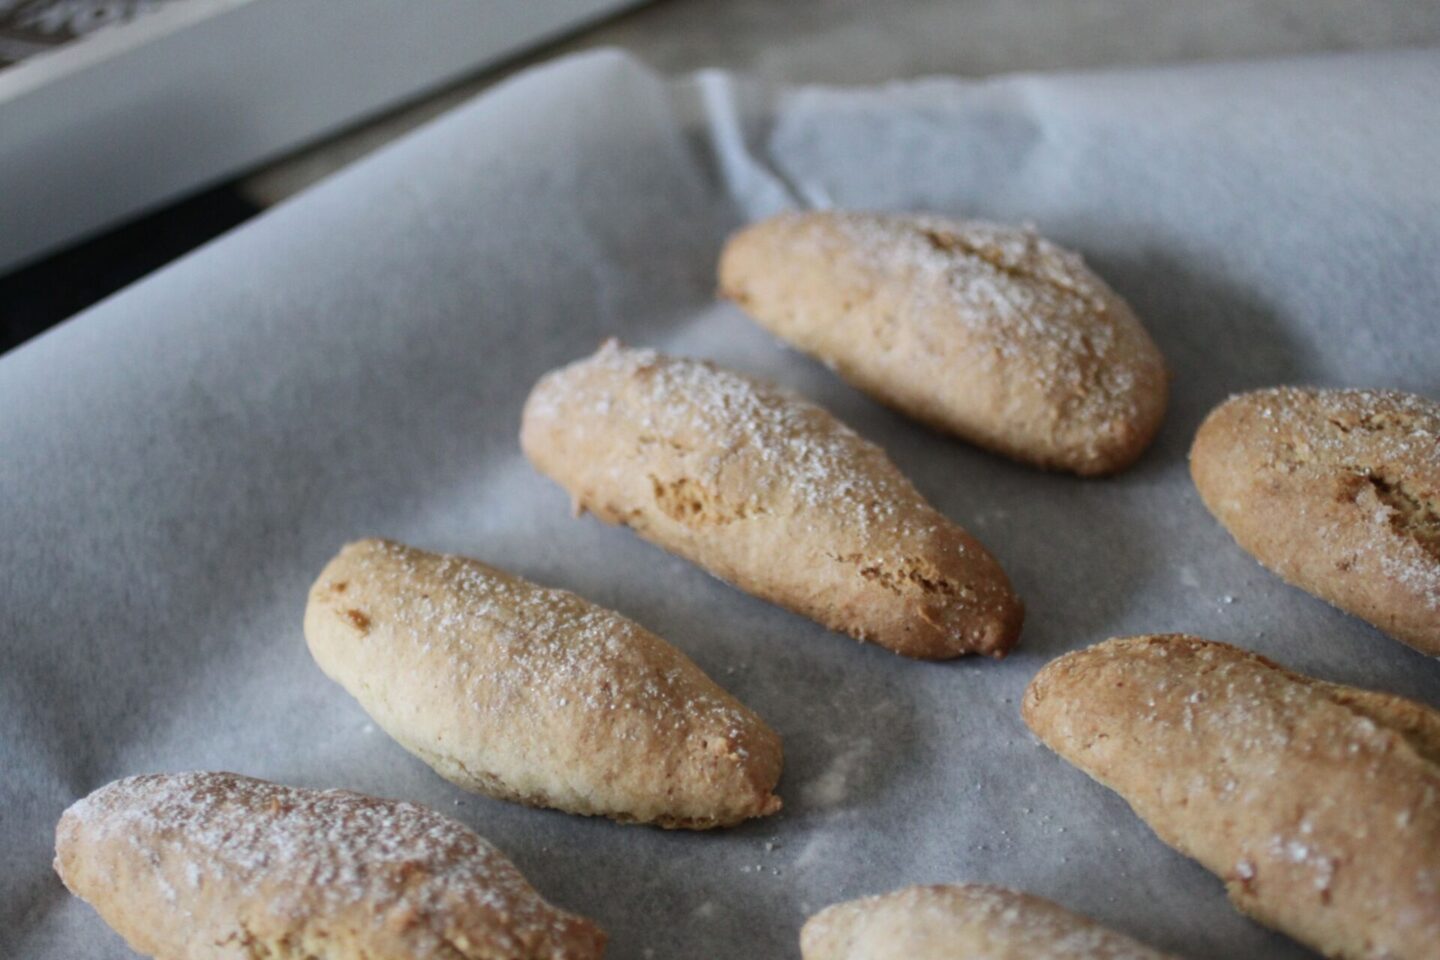
This recipe had me at my limits several times. Things went wrong. I didn’t think they were going to come out right. But I decided to plod on and try, and I got something that works. My inner perfectionist is screaming that they don’t all look perfect, and I could have made them again, fixed the error or two that went wrong along the way and made a pretty batch I was more proud of. But after taking a moment to appreciate the fact I thought they were going to fail and they actually turned out the perfect taste and texture, I realised that for most people, this is what home baking looks like. Unless you happen to be Nigella Lawson herself, most home bakes aren’t as 100% aesthetically pleasing as the image online you’ve followed the steps for and hoped it would look like.
So, this is real life. I made a mistake or two (I’ll tell you what not to do so yours look better), but they still taste great and are fully fit for purpose. Honestly, you can’t ask for a great deal more. Especially seeing as they’re going in a tiramisu and literally no one is going to see the error(s) anyway.
Nutritional Information
Ingredient Choices and Substitutions
For the batch featured in the pictures, I used the Oggs Whole Egg Replacer, which works but had me doubting myself along the way. I’ve also made these with aquafaba, and while the steps looked more consistent with the aquafaba, the result tasted identical. You may have less kitchen stress (more trust in the process) with an aquafaba egg replacer instead (details in the instructions). If you use aquafaba, you’ll need less volume than the egg replacer I used. Based on the conversion for both products to ‘real’ eggs, you’ll need about 85ml of aquafaba.
How to store, keep and reheat
Store in an airtight tub at room temperature and they should last up to two weeks.
Vegan Gluten Free Lady Fingers Recipe
A vegan gluten free lady fingers recipe perfect for your next homemade tiramisu or even for a dessert charcuterie board.
This recipe is gluten free, dairy free and vegan friendly. It does contain nuts.
Vegan Gluten Free Lady Fingers Recipe
Ingredients
- 50 g / ¼ cup vegan butter block form, not spreadable
- 185 g / 1½ cups plain gluten-free flour
- 60 g / ½ cup cornflour
- 1 tsp baking powder
- ¼ tsp bicarbonate of soda
- ¼ tsp salt
- 25 g almond flour
- ½ tsp xanthan gum
- 100 ml Oggs Whole Egg Replacer or alternative egg replacement, see substitutions above
- 5 ml / 1 tsp lemon juice
- 125 g caster sugar plus more to sprinkle
- 15 ml/ 1 tbsp vanilla extract
- icing sugar to sprinkle
Instructions
-
Preheat the oven to 200° C and line two baking trays with greaseproof paper. Prepare a piping bag with a plain 1.25 cm / ½” nozzle. Place the piping bag in a very tall glass for easy filling.
-
Melt vegan butter and allow it to cool down.
-
Combine flour, cornflour, almond flour, xanthan gum, baking powder, bicarb and salt in a separate bowl and get a fine sieve ready.
-
IMPORTANT – in an ideal world, we’ll now whisk the egg replacer with a hand mixer and hope it turns into a stiff peak like a meringue. My Oggs whole egg replacer didn’t do this, and I thought it might be game over here. However, despite the texture not looking as it theoretically should, the end product still works. If you opted for another egg replacer (like aquafaba), you should get the meringue peaks. Either way is fine for the end product. Trust the process.
-
Once you reach stiff peaks (or maybe not after a few minutes of mixing) start adding sugar (tablespoon after tablespoon), whipping the whole time until you’ve used up all the sugar and your mixture is thick.
-
Place a sieve over the bowl with the egg replacer and sugar and sift approximately a quarter of the dry ingredients through. Fold sifted ingredients into the mix very slowly and gently so that you don’t knock too much air out of the mixture. Proceed with the next two batches of the dry ingredients in the same manner.
-
Just before you fold in the last batch, fold in vanilla extract and melted vegan butter. Fold these liquids in slowly and gradually so that the mixture stays nicely aerated. Finally fold in the final portion of dry ingredients.
-
Once everything is just incorporated – the batter should be very thick – transfer the batter to the piping bag. Be very careful to press the mix down as you’re adding it to the bag. Because the mix is so thick it’s very difficult to pipe out if you let too much air in.
-
Pipe roughly 10 cm / 4″ long lines of dough on the two baking trays leaving some space around each finger.
-
Sprinkle each finger with caster sugar and very gently pat that in, followed by icing sugar (use a sieve, no patting necessary).
-
Bake for about 10 minutes, then open the oven for a few seconds to let the steam out, close the door and continue baking for another 4 minutes or so until lightly golden.
-
Allow them to cool down before transferring them to a cooling rack. Once completely cool, store them in an airtight container.
Leave a Reply